2.10.2012

Seed Starting

Hello there little gardeners!

I am coming to you live from my couch where a lot of garden planning as been taking place.  Because this winter has been so, so, so very warm and because I live in sunny California, about two weeks ago I started some seeds indoors hoping to get an extra early start on my garden this year.  Last year I was starting seeds in april and had some transfers in March, as a result many of my tomatoes didn't produce very much or for very long and my artichoke plant didn't get many artichokes until summer was over.

I have started sunflower seeds, zucchini, pumpkin, tomato, chamomile, chives, corn, lavender, and cucumber in a little seed starting tray.  Sunflowers and corn aren't particularly fond of being transplanted, so we will see how that goes but I was too excited to hold back much longer.  I had a bit of a problem with my seedlings, they grew long and floppy and started leaning towards the sunny window and falling over, so I decided that since it has been so warm lately, I would set out my seeds container in the sun every day to see if the little ones harden off.  I like having them in this tray that I can move indoors in the evenings because even thought the days have been summer-like, the evenings have been pretty frigid still.

There has been much weeding, pruning, and trimming in the past couple of weeks so that is fantastic.

Also, as a reminder to all of you apartment dwellers out there, now is a good time to start dressing up your containers and start thinking of good space-saving garden options like this hanging herb garden or this hanging kitchen container turned planter.  Check out pintrest for tons of other great gardening tips and tricks!

NVG-out!

11.29.2011

Vermicomposting: From Garbage to Garden

First of all, what is vermicomposting? Well, in short, it is a form of composting that in addition to bacteria and microbes, also uses worms to break down organic waste. This waste is full of awesome nutrients that help your plants grow healthy and strong without the use of chemical fertilizers.

Vermicomposting uses two types of worms that are specially adapted to conditions such as high temperatures and rotting vegetation. Basically, these aren't your average garden earth worms.

So, how does it work? Essentially, you feed your worms organic waste, they then eat it and help break it down.  And when they are done they poop! I know, super exciting, I didn't say it was a particularly glamorous process. But if you are one of those people that get squeamish at the word "poop," the more eloquent term for worm leave-behinds would be "worm castings."


So, what do you need to get started on your worm farm adventure?

First, you will need a bin. There are three types of worm composting bins.  There is a non-continuous bin that you throw all of your worms, bedding, and so forth into and then when the process is complete you have to empty and sift through the compost to find your worms to start it over again.  This is popular because it is cheap and easy to make, but it is also hard to harvest your compost without removing some worms.
There is also a continuous vertical flow bin set-up; this bin uses a series of trays that are stacked on top of one another.  You fill the bottom tray with your worms, bedding, and organic materials and let them go to work. Once the process is complete, you start filling the tray on top with bedding and organic matter and the worms will start to migrate upwards toward the food, making it easy to harvest the bottom tray. The third bin is similar to the CVF bin and is called the continuous horizontal flow bin, but instead of migrating up, the worms migrate to the side.  This set up, however, takes up a lot of space so is therefore undesirable for small spaces.
I use the vertical flow method as it is efficient and doesn't take up a lot of space.  The brand of bin I have costs about $105 and is called The Worm Factory.

The second thing you will need is bedding.  
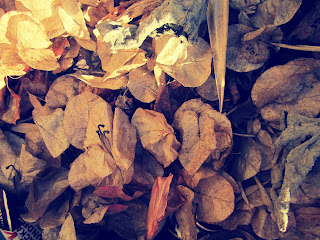
For bedding you can use shredded paper, cardboard, dead leaves, wood shavings, etc.  The idea is that this bedding should be high in carbon: think brown.  Sawdust, hay and peat moss also work. You want anything that is loose and facilitates aerobic respiration and decomposition. Loose bedding is also easier for the worms to move around in.  This bedding should be kept moist.

You should avoid using glossy paper because it may have toxins that aren't good for the system.  Cereal boxes and other cardboard used to hold food should be avoided as well because it is hard to break down.
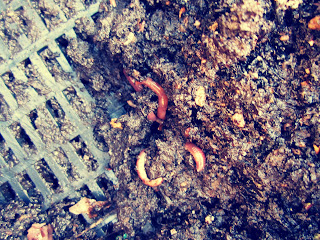
You will then need worms. As mentioned before there are two types of worms you can use: Red Wigglers and Red Earthworms.  I have Red Wigglers. You can get them at most nurseries or online for about $25/lb.

Finally, you will need organic material.  Worms are pretty low maintenance, they will eat almost anything.
  • Veggie/fruit scraps and peelings
  • coffee grounds (and filters), tea leaves/bags
  • egg shells

However, there are things that even worms won't or should not eat:
  • anything citrus, these fruits are way too high in acid
  • onions, tomatoes, chilies. Again, these are too high in acid.
  • Dairy products. Think of your worms as being lactose intolerant. 
  • Dog/cat waste. However if you do use this in your non-worm compost bin make sure to not use this compost on your edible plants. Dog/cat waste can have diseases.
  • Ashes from a fireplace: wood ashes are very alkaline which is bad for your worms and the micro bacteria that are working on your compost.
  • Meat: This mostly makes the worm bin stinky as it breaks down, which attracts flies and other annoying critters.
Here are some tips to send you on your composting way:
  • In warm climates, put your bin in the shade, worms don't like too much direct heat.
  • Contrarily, in cool climates bring your worm bin inside or put it in a warm/dry spot, they don't like being cold either.
  • Keep the contents of your bin moist (like a sponge that has been rung out).
  • when your bin starts to stink that means there is too much nitrogen (from greens) and it is time to add high carbon stuff (brown items) The general idea is to have 30 parts C to one part N
  • Large items take longer to decompose. Help your worms out by making things smaller, like putting your waste through a food processor first.

After all is said and done you have some awesome compost to work into the top soil of your garden.  Try not to use it as straight potting mix though. Also, there is a liquid fertilizer from the worm castings that you can use. I like to put it in a cleaned out milk jug to use when needed. You only need about two tablespoons of this vermicast to a liter of water.  My sister recommends letting it sit for a day and then to water your plants or add it to a spray bottle for an insecticide/foliar fertilizer (worm poop is also great for keeping away bad bugs).

So why do we do this? What is the point?
First, worm compost has a ton of nutrients. It also has microbes that helps break down nutrients in soil into plant available forms.
Last, it is a free form of fertilizer that is sustainable and organic. Why spend money and fossil fuels on synthetic fertilizers that will only promote desertification in the long run?  Exactly.

So go adopt yourself a pound of worms and get started.  
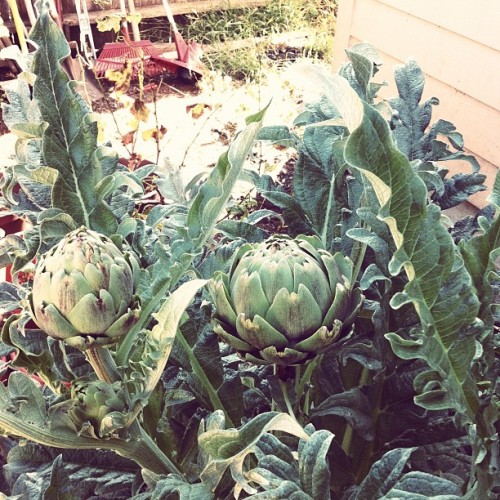
I found all of my information on worm composting at treehugger.com and wormfactory.us. I hope you found this useful!

My sister also recommends the book: Worm's Eat My Garbage: How to Set Up and Maintain a Worm Composting System by Mary Appelhof for a more in-depth idea of how to compost with worms.

10.21.2011

Artichokes!

Artichokes have been, and always will be, my favorite vegetable. EVER. So of course, Bob and I planted one artichoke plant back in March with the idea that we would easily be eating artichokes by May.  Our hopes were dashed as summer came and went, with no artichokes on the horizon.  The plant grew large but there were zero budding arties.  Then for about a week I didn't visit the garden due to some late summer/early fall rain keeping me inside... Finally, a day came where I threw open the curtains of our bedroom (which overlooks the garden) on the first sunny day after those rains and saw to my happy surprise that there were artichokes growing!  


We will be eating one of them tonight :)

9.26.2011

harvest satisfaction

I have been steadily harvesting fruit and vegetables for months now, each time with increased awe and wonder over the fact that this was MY creation.  How could something so tasty come from something so small as a seed?  I have harvested onions, garlic, tomatoes, potatoes, squash, and carrots, many times.  This is beautiful. Something so primordial and so right.
When I started this project, I planted only foods that I KNEW I liked: Large tomatoes, zucchini.. etc.  But later in the season, Bobby convinced me to plant foods that I wasn't necessarily crazy about, i.e. cherry sized tomatoes.  I have NEVER liked cherry tomatoes despite my everlasting love of their larger counterparts.  I've never liked the way they explode in your mouth, or how sour they sometimes were.   But plant them I did, in a mission to find something good about them.  I cared for these tomatoes as aphids and powdery mildew tried to kill them off. I watered, I fertilized, I pruned. Then came the day the first of the bunch ripened.  It was one little tiny runt of a thing, all lonely and sad.  Bobby ceremonially cut it in half and we each ate a half right there in the garden, we were desperate for any form of tomato as our larger tomatoes hadn't ripened yet. I bit, I chewed.... I nearly cried. It was wonderful!  If anything could convince me that this project of growing my own veggies for taste was a good idea, it was this moment.
Isn't it funny how your whole outlook on food changes when you have cultivated it yourself?  When you have watched this living thing sprout from seemingly nothing, carefully monitoring its progress, fighting off disease and pest with precision and care, you grow to love it. It doesn't just taste better because it doesn't have preservatives and hasn't been carted 2,000 miles to get to you... it tastes better because it was yours from start to finish.

7.20.2011

Harvest, kinda.

Quick update:

Garlic, the stinkiest harvest ever!
Again, garlic, successfully braided.
The kind of carrots only a mother could love
My, what big onion you have!

The vines finally have little leaves!
This zucchini tasting freaking delicious! 
After a two month germination period, the parsley is finally up.
Gosh, it took long enough!
Lovely tomatoes.
And just for fun, Seamus being dapper indeed.

6.09.2011

This is my future

Two days ago, Bobby and I came home with 17 grapevines, given to us by the vineyard manager at Tally Winery. This brings our vine family up to 18. It is not certain that all of the plants will live, however positive thoughts and daily watering will be applied.  After packing mushroom compost around each plant and giving them a thorough soaking, I had a sobering thought. This could be the beginning of my future vineyard. What a story that will make for a back label: "these grapes began as nothing more than a college student's dream of green."  I have placed them in pots until I can purchase half wine barrels for each. Let us keep our fingers crossed. Right now, these new vines appear to be nothing more than sticks in the mud.


6.01.2011

A Bevy of Books for the Picking

I, once again, humbly apologize for my extended leave of absence from the blog-sphere. As a student, my time is not my own, and officer I am sticking to that story.

There has been much going on in the month or so I have been away from my keyboard; I have finished finals (wonderful grades in all), added a few new plants to my growing family of backyard edibles, and have secured the front house for Bobby and I next year. The latter is amazing news, as I was very concerned as to how I was going to manage moving all of my root edibles (garlic, onion, potato) to a new home without them dying. Now I don't have to worry about such things and with the good news went out and bought strawberries. I will post new photos of my little plant community soon, but today I wanted to talk about a few books that have helped me immensely in my new lifestyle and to speculate about a few more I haven't gotten my dirt stained hands on yet.


The book that started it all, of course, was Animal, Vegetable, Miracle by Barbara Kingsolver and family.

This book is essentially about a family who decides to forgo the luxury of purchasing imported goods in favor of a local and self-sufficient lifestyle.  This was meant to try to cut down on the vast cost this country spends on fossil fuels, not only in the transportation of such goods but also in the manufacturing of them.  Barbara tells the story of her family's transformation into the locavore lifestyle with colorful accuracy, and my heart was sold to the idea.  I have taken to heart her declaration that vegetables are beautiful, and have taken it upon myself to give my backyard color and variety with plants that I can eat.  I recommend this book to anyone. Even those who have never been interested by the idea of gardening themselves will be swayed to at least put a few herbs in their windows after reading it.


The Backyard Homestead, was my next natural step in becoming self-sufficient.  This book has everything from growing herbs for tea to building and operating your own cider-press to raising and slaughtering your own chickens.  Though I am far from ordering chicks from a catalog and raising them for meat or eggs (not that I don't want to but my landlords would never allow such a thing), this book has aided me in container gardening, making bread, and what herbs to put in teas to calm a sore throat.

This book is great for the burgeoning Homesteader.


Sunset's Western Garden Book of Edibles has been my encyclopedia and, I am convinced, my success to growing such a prolific garden.  This wonderful book holds answers to all of the questions I had about where to plant, how much sun a plant should have, whether it would grow well in containers, how much watering should be done, and so much more.

It even has some beautiful photos of landscaping ideas, how to turn your edible garden into a work of art.  One of the useful tips it gave me was how to get protect my delicate plants from snails: copper foil and some beer in dishes did the trick.

The following books are those that are on my wish list.